


Hey there Everyone 👋! Welcome back to a new blog on Hosting with Github. So, let's start!
Where it all started was, I was browsing through my Twitter feed. One trending topic and issue I found amongst people was regarding hosting (Even though, It's slowly being resolved, and we can host in a lot of places for free). I've noticed that people usually love free products, and don't tend to pay, unless really necessary. I mean, who even loves to pay, right?
That brought me to Heroku. I thought it is free! But it's limited, as always. And also, people usually face issues while making the app heroku-compatible using Procfile, as it can get confusing. Then, I found about Github's CI/CD. Interest grew me inside that, Since it's a virtual machine, and can run code, It should be able to run apps, right? And also it's free too! ✨ I gave it a shot, and It worked so wonderfully.
Alright! So, let's explore how we can host a simple discord bot in Python. Let's start :)
Initialize the bot!
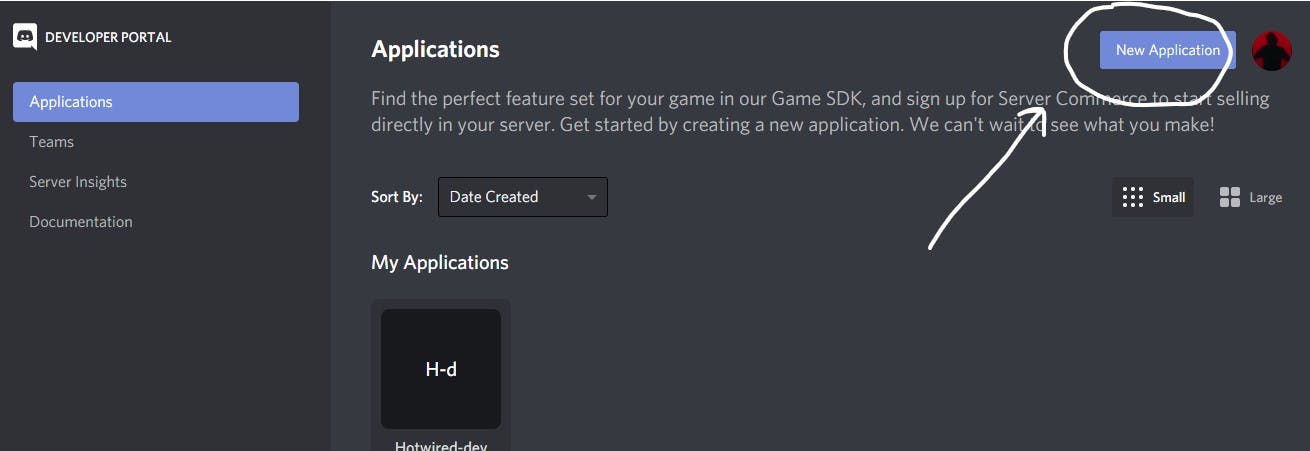
Step 1: Create the Discord-API application.
The first step is to browse over to the Discord Developer Portal: discordapp.com/developers/applications
This portal shows all of your applications and bots, that you've created.
If you already have a bot created, click it in the list. If you have none initialized, Hit the "New application" button.
Step 2: Give your app a name
Here you'll be prompted to give your application (bot in this case) a name.
Since we're making a bot, this name will be used for the bot, that you'll invite and use too. I named it "Test bot", since it's for demo.

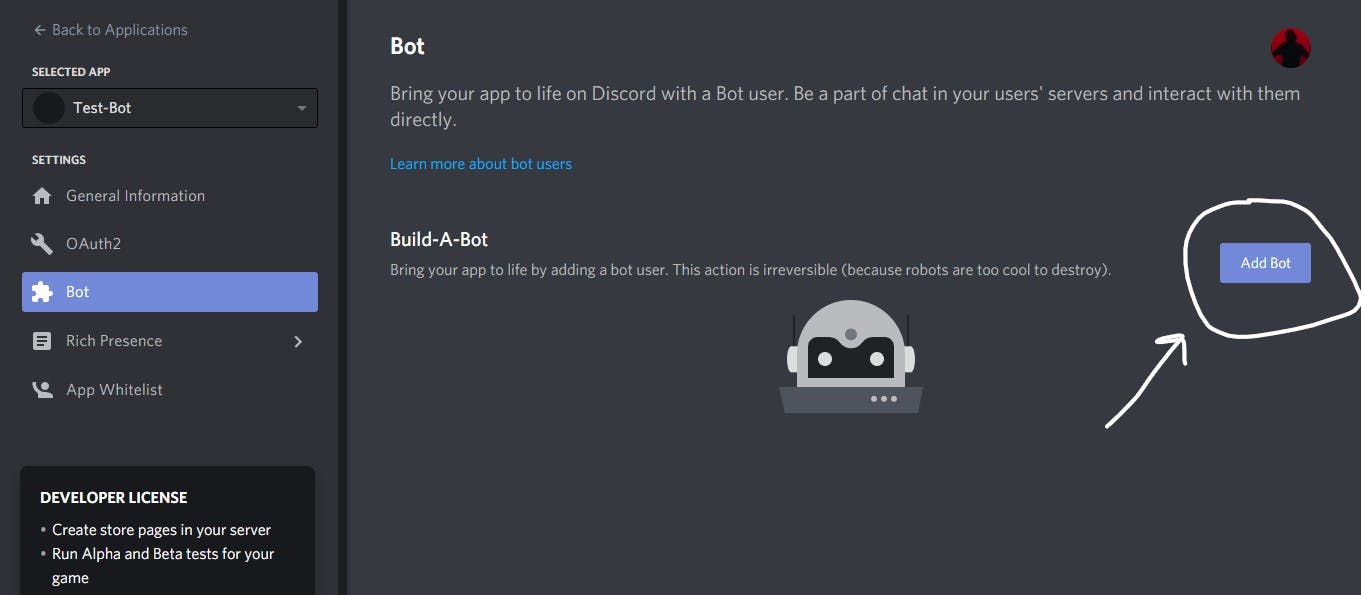
Step 3: Make it a Bot
After creating the Application, Got to the Bots tab and Click on "Add Bot" Button to generate a token and make it a Bot Application!
Step 4: Get the Token of the bot
Once the bot is initialized, You need the token. It is used to authenticate and verify, when communicating with the Discord API and performing functionalities, you intend to.
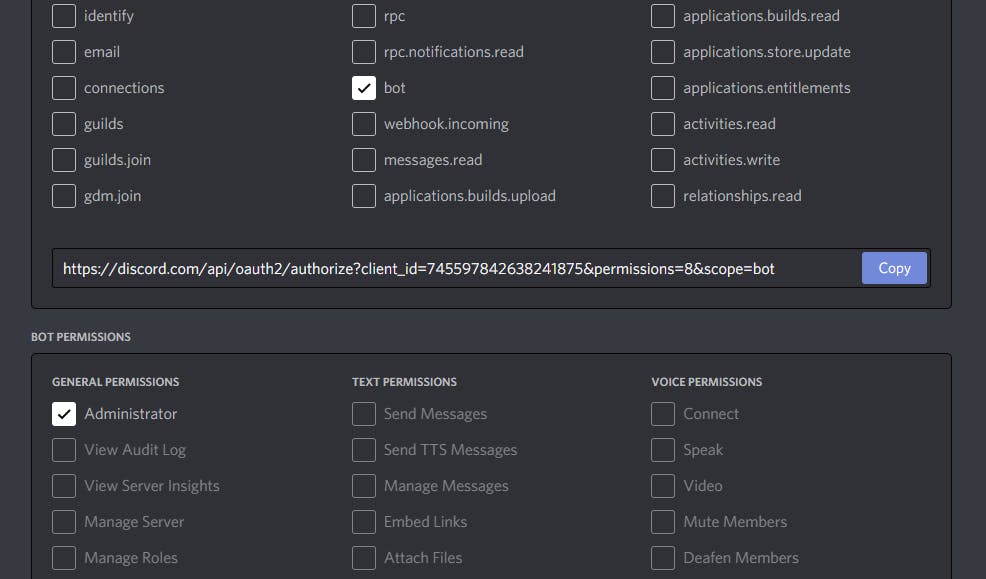
To use a bot, It needs to be invited to a Discord server too. First, Choose the permissions, I'll choose Admin, but it's not recommended for a real bot (You can find them in OAuth2 tab).

Step 5: Invite the Bot
Copy the link generated, and paste it in a new browser tab, and it will look like this, after selecting your server click invite
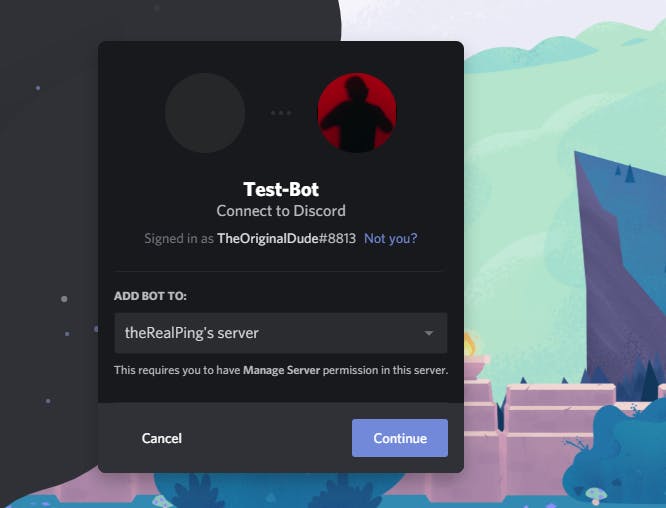
And voila! Once done, It'll be like this.
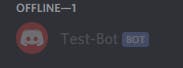
It's currently offline, as we haven't programmed it yet. Let's do that! :)
Code the Bot!
Install discord.py to create Discord bot.
Fire up Command prompt/Terminal, depending on what your OS is, and then use the following command.
pip install discord.py
It should look like this.

I'm good to go, as I have it already installed.
Program the bot
Go back to the developer settings in discord dev portal. Grab the token from the bot tab.
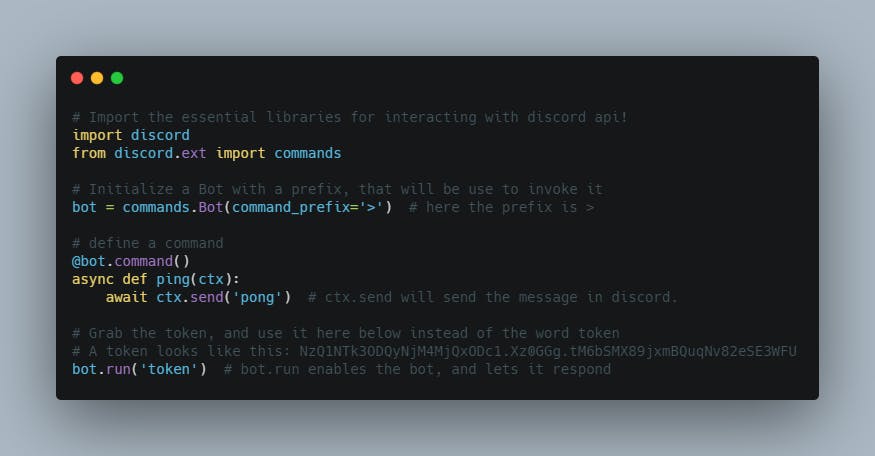
Once done, Make a file bot.py. We'll make a bot that responds with pong to the ping command.
Run the bot!
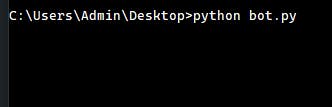
Return to the terminal now, and navigate to the file location. Then run the following command,
python bot.py
Once done, you can't enter the commands, then go back to discord, and then check on the bot!
 As you can see, It's Online! 🎉
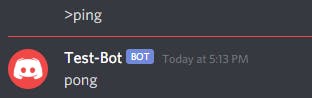
Now, let's try the ping command, which will be {prefix}ping where you need to replace the prefix and braces with the commands prefix specified in code, in my case it's >, So, let's try the command!
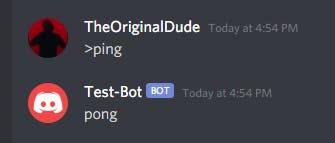
As you can see the bot replied, now let's see what happens when we stop the code!
So it goes offline, But we need to run it 24x7 to respond to the commands and reply, now this is where we're gonna host it!
Hosting the bot!
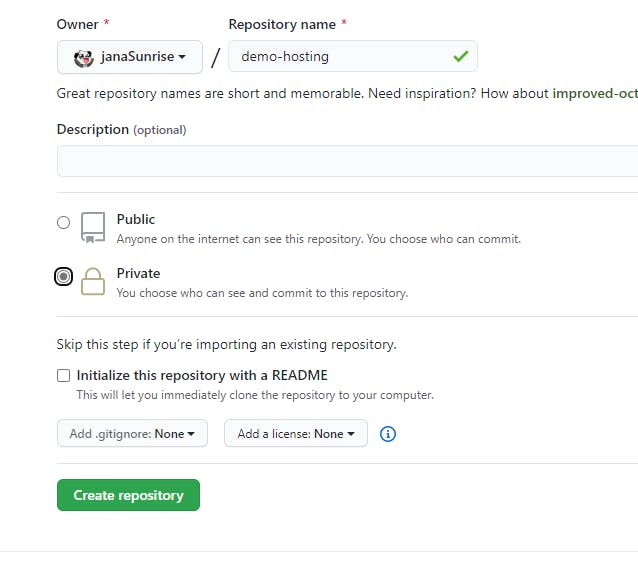
Create a Private repository
Visit Github, Create a new private repository, with following configurations.
Add the required files
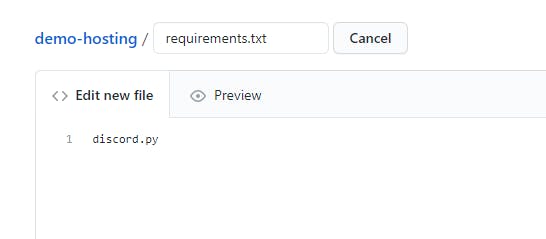
We need 2 files to host. bot.py with the bot's program, and requirements.txt to install the dependencies.
Here's the requirements:
Here's is the code for the bot.
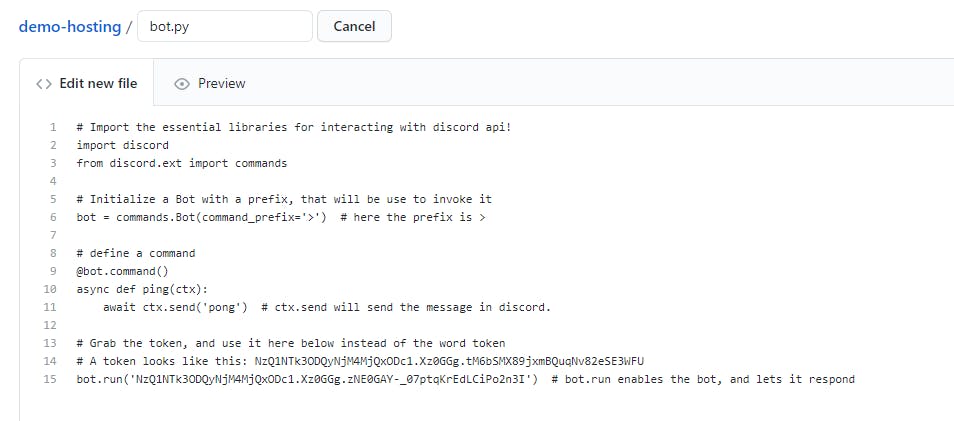
I have replaced the placeholder of token with my real token, it will be removed once I am done. Make sure to use proper token, else it will result in an error.
Then once you're done we can move to next step!
Creating Github actions for hosting.
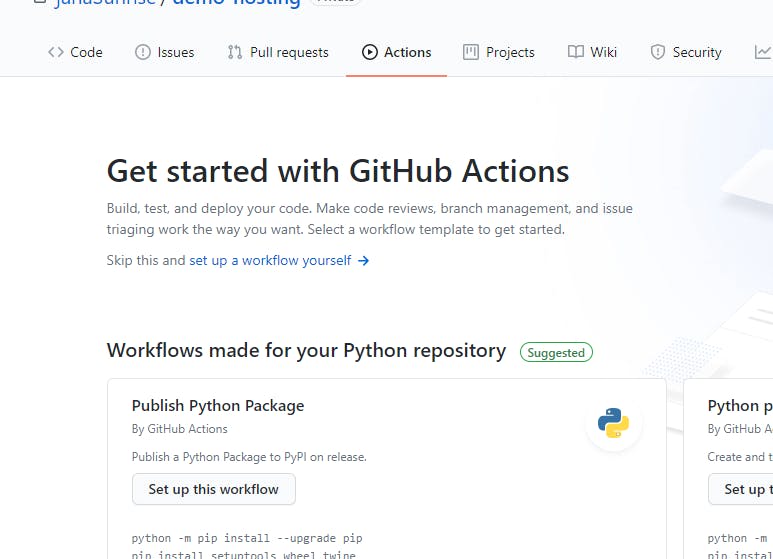
Visit the Github actions tab, and use the second workflow template, which we'll modify to our liking.
Since I am using requirements.txt, Here's my config for the actions.
name: Hosting

on:
  push:
    branches: [main]

jobs:
  build:
    runs-on: ubuntu-latest
    strategy:
      matrix:
        python-version: [3.8]

    steps:
    - uses: actions/checkout@v2
    - name: Set up Python ${{ matrix.python-version }}
      uses: actions/setup-python@v2
      with:
        python-version: ${{ matrix.python-version }}
    - name: Install dependencies
      run: |
        python -m pip install --upgrade pip
        if [ -f requirements.txt ]; then pip install -r requirements.txt; fi
    - name: Run the bot
      run: |
        python bot.py
Once you're done, click on the commit button, and you're ready to go.

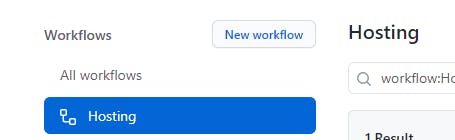
Then, click on the hosting Workflow in actions tab.
Then, select a build, and look at the hosting part, in the right side of the console.
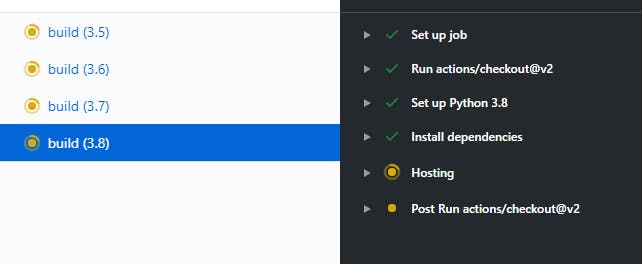
You'll see it to be always swirling, never stopping, and that means you're done. The bot is hosted, and You're good to go!
 Boom! 💥 The bot will now run, forever!
 And, yes! It responds too, But one more thing, This is just not only limited to bot, but you can use it for anything you want to host for free, nothing to pay, you get free hosting!
So, I hope this was an interesting, and informative way, to find a solution for free hosting. I will be back again with new ways to do something, my opinion on any topic, or some more amazing things! :)
Stay tuned for new Guides on various topics! 😄
Be sure to react, drop a comment and share with everyone, if you enjoyed reading so far!
This is Sunrit, Signing off for now😁 See you next time 👋 Peace Out!